
Grease buildup on kitchen cabinets is a problem every homeowner faces eventually. Over time, cooking oils, steam, and splatters create a sticky film that attracts dust and dulls the appearance of your kitchen. The longer you wait to clean it, the harder it becomes to remove. Whether your cabinets are made of wood, laminate, or painted surfaces, knowing how to clean them properly can restore their natural beauty without damaging their finish.
This comprehensive guide covers everything you need to know about removing greasy buildup safely and effectively. You’ll learn what cleaning solutions work best, how to deal with tough spots, and the right way to keep your cabinets looking clean for months.
Why Cabinets Get Greasy

Cabinets get greasy because of airborne oils and kitchen steam. When you cook, small droplets from frying, boiling, and sautéing settle onto nearby surfaces.
Main causes include:
- Airborne grease: Created while frying or sautéing food.
- Poor ventilation: Not using a range hood lets oil linger longer.
- Dust buildup: Grease + dust = sticky film that clings to surfaces.
- Infrequent cleaning: Allowing grease to sit makes it harder to remove.
Understanding these causes helps you prevent future buildup by improving airflow and cleaning more consistently.
Supplies You’ll Need
Having the right tools ready makes cleaning easier and faster.
Basic supplies:
- Microfiber cloths or soft rags
- Mild dish soap
- Warm water
- Spray bottle
- Dry towel
Extra tools for tougher grease:
- Baking soda
- White vinegar
- Soft-bristle toothbrush
- Small bowl (for soaking hardware)
These items will give you everything you need to clean both light and heavy grease safely.
Step 1: Dust and Wipe First
Starting with a quick dusting prevents scratches and keeps grime from spreading.
How to do it:
- Use a dry microfiber cloth to remove loose dust and crumbs.
- Focus on corners, edges, and grooves where dust collects.
- Don’t forget the tops of upper cabinets if they are exposed.
This step gives you a clean surface to work with and makes your degreasing solution more effective.
Step 2: Mix a Gentle Cleaning Solution
A mild cleaning solution is enough for most cabinets.
Easy homemade degreaser:
- 2 cups of warm water
- 2–3 drops of dish soap
- Mix in a spray bottle and shake gently
Pro tips:
- Always start with the gentlest cleaner before trying harsher ones.
- Avoid bleach or ammonia-based sprays — they can strip finishes.
- Test your solution on a hidden spot before cleaning the entire surface.
Step 3: Wipe Down Cabinet Surfaces
Once your solution is ready, it’s time to wipe away the grease.
Best cleaning method:
- Spray solution onto the cloth or directly on the cabinet.
- Work in small sections from top to bottom.
- Use circular motions to loosen grease.
- Rinse cloth often so you aren’t spreading dirt around.
- Dry with a clean towel right after wiping to prevent water damage.
This gentle process removes most of the grease layer without harming the finish.
Step 4: Tackle Stubborn Grease Spots
For thick or baked-on grease, you need a little more power.
Try these solutions:
- Baking soda paste:
- Mix 1 tbsp baking soda + a few drops of water.
- Apply to the spot, wait 5 minutes, then scrub gently.
- Vinegar spray:
- Mix equal parts white vinegar and water.
- Spray on greasy areas and wipe clean.
Extra tips:
- Always dry surfaces after cleaning with vinegar.
- Test vinegar first if you have wood cabinets to avoid dulling.
Step 5: Clean Cabinet Handles and Hardware
Handles and knobs collect the most grease because they’re touched daily.
Steps to deep-clean hardware:
- Unscrew handles and knobs if possible.
- Soak them in warm, soapy water for 15–20 minutes.
- Use a toothbrush to scrub away residue.
- Rinse with clean water and dry completely before reattaching.
This extra step makes a big difference in how clean your kitchen looks.
Step 6: Don’t Forget the Inside
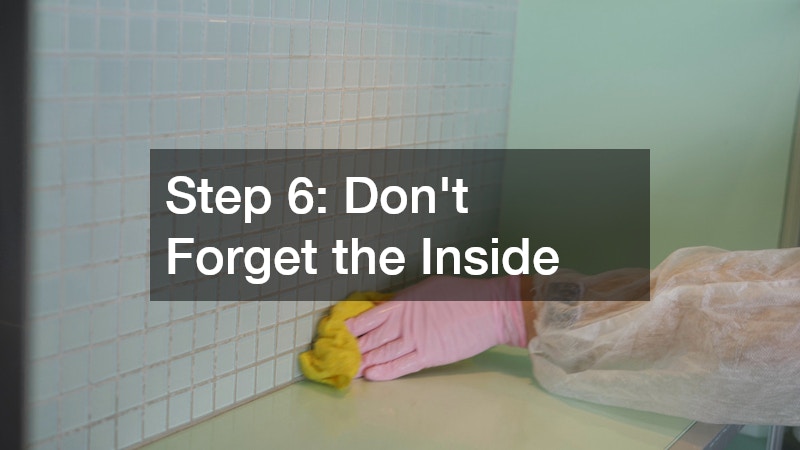
Cabinet interiors also get greasy and dusty over time.
How to clean inside cabinets:
- Empty contents and vacuum crumbs or debris.
- Wipe shelves with your mild soap solution.
- Wash or replace shelf liners.
- Let everything dry completely before restocking.
Cleaning the inside keeps your kitchen sanitary and prevents odors from forming.
Step 7: Dry Thoroughly
Moisture can warp wood and damage finishes, so drying is crucial.
Tips for drying:
- Use a clean, dry microfiber towel.
- Pay attention to corners, edges, and hardware areas.
- Leave cabinet doors open for a few minutes to air out if necessary.
Thorough drying helps preserve your cabinets’ appearance for years.
Special Care for Different Cabinet Finishes
Each cabinet type needs slightly different care. If you’re wondering how to clean wood cabinets safely, here are general guidelines:
By finish type:
- Wood cabinets: Use minimal water and always dry quickly.
- Painted cabinets: Be gentle to avoid chipping paint.
- Laminate cabinets: Can handle vinegar solutions without damage.
- Matte/chalk-painted cabinets: Avoid oil-based polishes that streak.
Knowing your finish ensures you use the safest cleaning products.
Natural vs. Commercial Degreasers
You can go natural or choose store-bought cleaners depending on your preference.
Natural options:
- White vinegar (cuts grease naturally)
- Baking soda (gentle scrub for tough spots)
Commercial options:
- Choose products labeled “safe for wood” or “kitchen degreaser.”
- Avoid bleach, ammonia, or abrasive powders that damage finishes.
Always test new products in a hidden area first.
Tips to Keep Cabinets Clean Longer
Adopting good habits makes future cleaning easier.
Maintenance habits:
- Wipe spills right away, especially oil or tomato sauce.
- Use your range hood while cooking to trap grease.
- Do a quick weekly wipe-down of doors and handles.
- Use cabinet liners to protect shelves from leaks.
- Declutter cabinets to make cleaning faster.
Safety Tips When Cleaning Greasy Cabinets
Protect your cabinets and yourself while cleaning.
Safety checklist:
- Use damp (not wet) cloths to avoid soaking wood.
- Avoid abrasive scrubbers that can scratch finishes.
- Skip harsh cleaners like bleach or ammonia.
- Work in small sections so water doesn’t sit too long.
- Wear gloves to protect your hands from heat and soap.
When to Deep Clean vs. Spot Clean
You don’t need to deep clean every week.
Cleaning frequency:
- Spot clean: After cooking greasy meals.
- Deep clean: Every 2–3 months if you cook regularly.
- Seasonal clean: Before holidays or during spring cleaning.
Staying consistent prevents stubborn grease from forming.
When to Call a Professional
Some jobs are better left to the pros.
Call for help if:
- Cabinets have years of heavy, hardened buildup.
- You plan to refinish or repaint cabinets.
- Cabinets are antique or delicate wood that could be damaged.
Professionals use safe, specialized cleaners to restore cabinets without harming them.
Final Thoughts
Learning how to clean greasy cabinets doesn’t just improve how your kitchen looks — it also extends the life of your cabinetry. By using gentle cleaners, addressing stains right away, and maintaining a consistent cleaning routine, you can prevent sticky buildup and keep your kitchen looking fresh year-round.